
Git
Overview
We use the Git version control system with gitlab.ewi.tudelft.nl to manage submissions and grade assignments.
Setup
If you don’t already have a GitLab account, sign up first! Use your student email adress and NetID as username for your account. Get in touch if you registered with a different username than your NetID.
Once you have a GitLab account, download and install Git from this page. We will be using the Git command-line, since it is more powerful and easier to troubleshoot than GUI clients. On Linux and macOS, installing Git should provide a git command on your shell. On Windows, Git installs Git BASH to provide a command-line shell, which you need to start to use Git from the command-line.
We will explain the steps needed to work on and submit assignments in this guide. To learn the basics of git, read git - the simple guide and try out the Git command-line. If you’d like to learn more, have a look at these resources.
Repository Structure
Let’s look at the repository structure first.
On GitLab, we will create a private git repository for you, which is owned by us, and is only visible to you and the compiler construction team. This repository will host assignment templates and your submissions in protected branches. Note that you do not have write access to protected branches. You can only read from it and submit assignments to it by opening merge requests. This is to ensure that you cannot mess with submitted assignments after the deadline. You do have access to non-protected branches, and this is where you can push your work frequently.
Getting started
First, find your private repository in the CS4200-B/2019-2020 group on GitLab, it should be called student-id where id is your student id.
To actually do work in the Git repository, you need to make a local clone of the repository on your computer. You can find the URL needed to clone on the bottom right of the page, be sure to use HTTPS.

Open up the command line and make a local clone with your URL:
git clone https://gitlab.ewi.tudelft.nl/CS4200-B/2019-2020/student-id.git
Now cd into the local clone and confirm that it works:
cd student-id
git status
which should output something like:
On branch master
Your branch is up-to-date with 'origin/master'.
nothing to commit, working directory clean
Your local repository is set up now! Follow the steps below to work on an assignment.
Workflow
Starting an assignment
You work on each assignment in its own development branch, named assignment-1-develop, assignment-2-develop, etc.
The correct assignment branch must be checked out in your local Git repository to be able to work on it.
The steps to check out a branch depend on whether we provide you with a template, or if you continue with work from a previous assignment.
Template
If the assignments asks you to check out a template, which for example assignment-1-template does, use the following steps:
git fetch origin
git checkout -b assignment-1-develop origin/assignment-1-template
git push -u origin assignment-1-develop
This checks out a fresh branch from the remote repository. It does not contain any of your previous work.
Continue from previous assignment
If the assignment asks you to continue from the previous assignment, which for example assignment 3 does, use the following steps instead:
git checkout -b assignment-3-develop
git push -u origin assignment-3-develop
The new assignment-3-develop branch will be in an identical state to the assignment-2-develop branch, but changes will only be committed to the assignment-3-develop branch, leaving the assignment-2-develop branch as is.
Now you have the assignment branch checked out in your local repository and can start working.
Saving work
Whenever you have changes that you’d like to save, such as after getting (a part of) the assignment working, you need to add, commit, and push your changes:
git add --all
git commit -m "Message describing your changes"
git push
Submitting an assignment
Merge requests are used to submit an assignment from your develop branch to its corresponding submission branch.
Make sure you’ve pushed all your changes first, then go to your repository on GitLab. Navigate to Merge Requests and click the New merge request button:
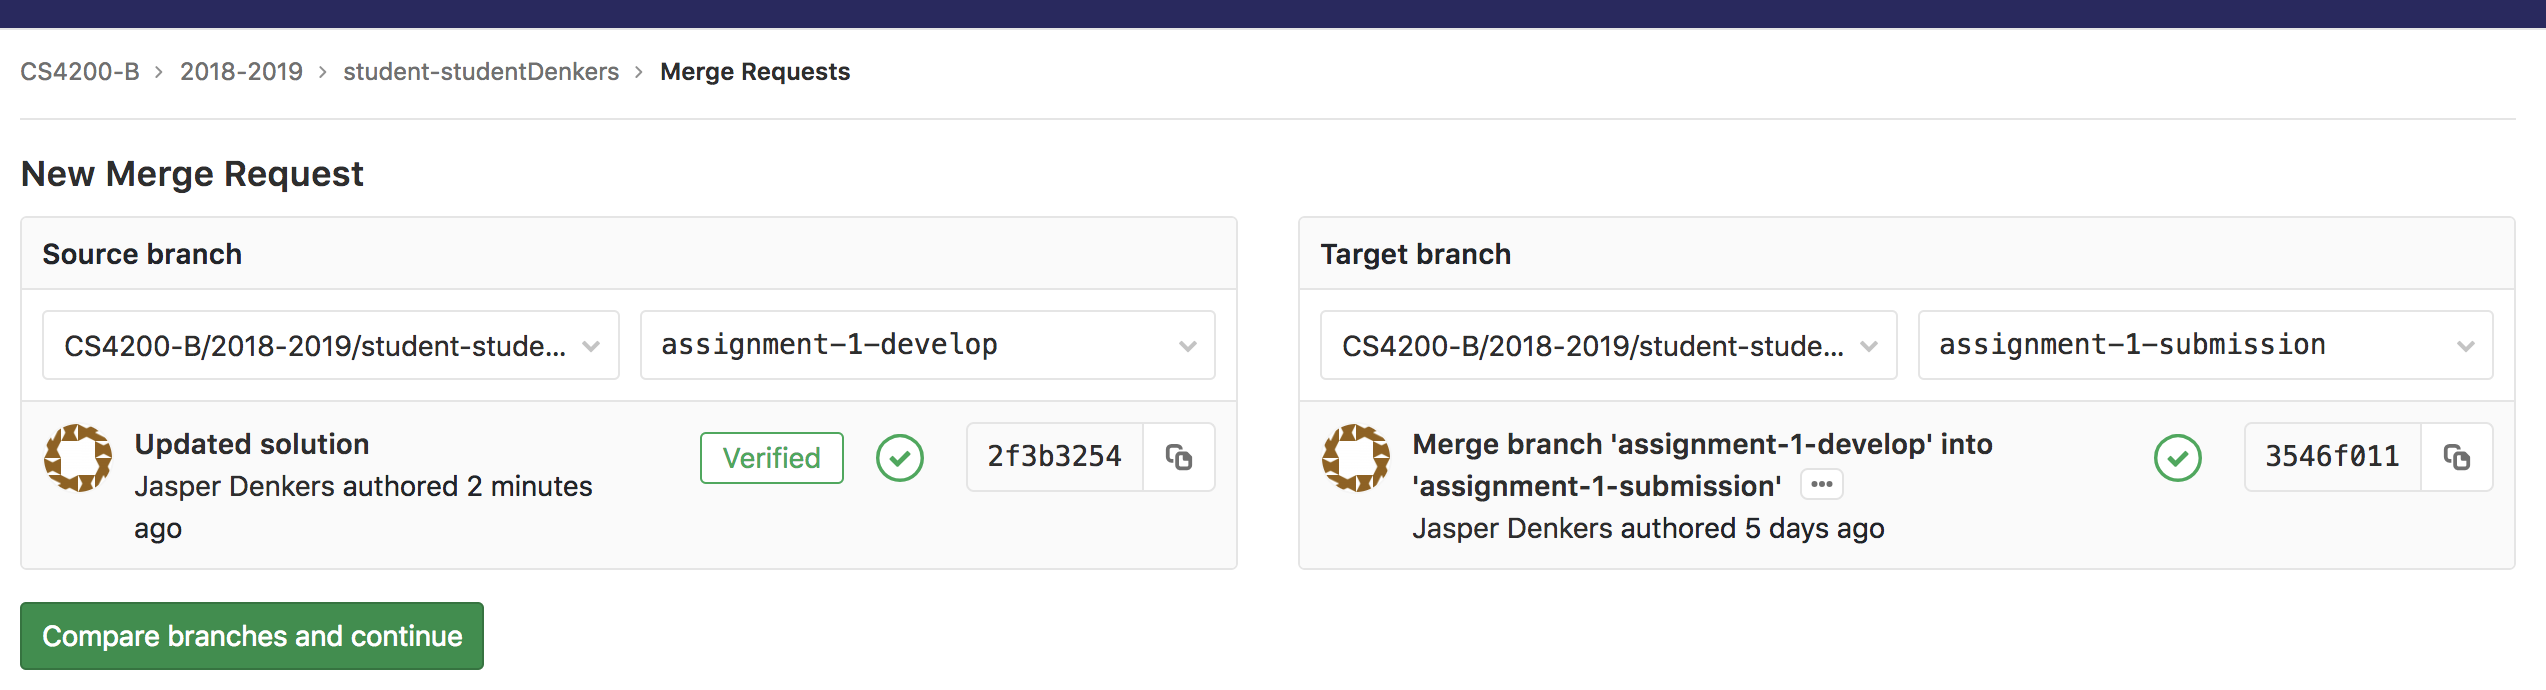
Select the develop branch as source and its corresponding submission branch as target. Click Compare branches and continue.
If all is well, you can review your changes and you can press the Submit merge request button to submit your assignment. If not, check the troubleshooting section.
We will grade your assignment and post the results as an issue in your project, so check back later.
Switching to another assignment
If you’d like to work on an another assignment, for example to fix things for a new submission, you can just check out the branch for that assignment. Be sure to push any changes to your current branch first, then check out the branch for the assignment you wish to switch to:
git checkout assignment-1-develop
Pulling in changes from template
If there’s something wrong in the template for an assignment, we fix it in the template branch, and you have to merge in those changes. Use the following commands to merge in changes (use the correct branch!):
git fetch origin
git merge origin/assignment-1-template
git push
In most cases, Git will automatically merge in any changes, but sometimes conflicts can occur. See Resolving a merge conflict on how to resolve conflicts.
Git GUI clients
This guide uses command-line Git commands, but if you’d rather use a GUI, use SourceTree.
Troubleshooting
Cannot push
No access/rights
When Git complains about not being able to push because you do not have access or rights to the repository, this probably means that you’re trying to push to a template or submission branch rather than a develop branch.
Out of date branch
You cannot push changes to a remote when that remote has changes that you haven’t yet pulled, you’ll get an error like:
git push
To ...
 ! [rejected]        assignment-3-develop -> assignment-3-develop (non-fast-forward)
error: failed to push some refs to '...'
hint: Updates were rejected because the tip of your current branch is behind
hint: its remote counterpart. Integrate the remote changes (e.g.
hint: 'git pull ...') before pushing again.
hint: See the 'Note about fast-forwards' in 'git push --help' for details.
First pull changes with git pull and then push your changes.
Cannot pull
Local changes
When you have changes in your local repository that you have not committed yet, and you try to pull, Git may complain about your changes being overwritten. First add and commit your changes locally with:
git add --all
git commit -m "Message describing your changes"
and then pull changes with git pull.
Cannot automatically merge merge request
If a merge request cannot be automatically merged, your branch is out of date with the template branch. Merge in changes from the template (use the correct branch!):
git fetch origin
git merge origin/assignment-1-template
git push
Resolving merge conflicts
See Resolving a merge conflict on how to resolve merge conflicts. You can also try a GUI merge tool such as DiffMerge to resolve merge conflicts.